Orders placed April 3–6 will have a 5–7 day delivery lead time due to a system update. We appreciate your patience!
Orders placed April 3–6 will have a 5–7 day delivery lead time due to a system update. We appreciate your patience!Secure Payments Free delivery over £30
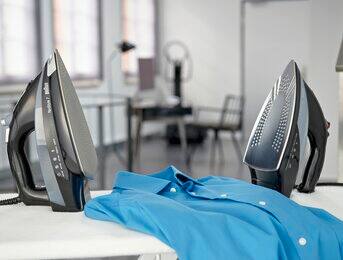
Whether it’s a day in the office or an important event, a perfectly ironed shirt can help polish your look. Not sure where to start? Follow our step-by-step guide for the best way to iron shirts and keep them looking great all day. What to do before you start Before you start ironing your shirt, check the laundry symbols in the care label to find the recommended ironing temperature. Look for one of these symbols: • A crossed-out iron: do not iron. • An iron: ironing is allowed. • An iron with one dot: iron on a maximum temperature of 110°C. • An iron with two dots: iron on a maximum temperature of 150°C. • An iron with three dots: iron on a higher temperature of up to 200°C. To avoid staining your clothes, also ensure your iron is clean. How to iron a shirt: Step-by-step guide Follow these 10 easy steps to keep your shirts wrinkle-free. 1. Prepare the iron Fill the iron’s water tank and set the appliance to the steam setting. This will help smooth out creases in your shirt. 2. Iron the shirt collar Wondering how to iron the collar on a shirt? For the best results, iron the inside of the collar, followed by the outside. 3. Move on to the cuffs Repeat the same method above with the cuffs, starting with the inside and finishing with the outside. Carefully iron around the buttons to smooth out any creases. 4. Iron the sleeves To iron shirt sleeves, place one sleeve flat on the ironing board, with the seam facing the edge. Iron the shirt from the shoulder to the cuff, then turn the sleeve over and repeat the same process. For precise results, consider investing in a sleeve ironing board. 5. Iron the shoulders Ironing shirt shoulders can be tricky and requires practice. To prevent creases, tuck the shoulder over the pointed end of the ironing board. 6. Iron the front of the shirt Next, iron the front of the shirt, working from top to bottom. To keep the shirt securely positioned on the board, work on one side and then move to the other. 7. Iron the back of the shirt Turn the shirt over and lay it flat, with the collar pointing towards the tip of the ironing board. Iron from top to bottom. 8. Check for creases Quality-check your garment and go over any remaining creases. 9. Hang your shirt To prevent your shirt from creasing, place it on a hanger. 10. Let the iron cool Switch off your iron and let it cool. You should also empty the water tank to prevent limescale from building up. How to iron a dress shirt Dress shirts are a staple piece in every formal wear wardrobe. Here’s how to iron them correctly. 1. Iron the collar Using smooth motions, iron from the tip of the collar to the middle. Be careful not to iron any creases into the collar, and don’t turn it down until you’ve finished the rest of the shirt. 2. Iron the cuffs Unbutton one of the cuffs and position it flat on the ironing board. Iron towards the sleeve from the bottom of the cuff. Flip the cuff over and repeat this process. Do this for both cuffs. 3. Move on to the sleeves Place one sleeve on the ironing board, making sure that both layers of fabric are smoothed out. Iron carefully, and repeat with the other sleeve. 4. Iron the shoulders and back Find the armpit of the sleeve and hook it over the tip of the ironing board. Iron the shoulders flat. Then, iron from the shoulder to the mid-back of the shirt. 5. Finish with the front Starting with the placket, iron each side of the shirt from top to bottom. Weave the iron around the buttons to finish. How to iron a shirt without an iron For a quick, reliable way to iron your clothes without an iron, consider using a garment steamer. These devices are lightweight, easy to use and help protect the fibres while smoothing over creases. Plus, there’s no need for an ironing board, making them convenient to use on the go. Upgrade your ironing routine with Braun steam irons and steam generator irons – shop the range today to find outstanding designs for your household.